For Band Leaders
Stop chasing your members. Get booking answers instantly.
Your Role in CanWePlayIt
As a band leader, your setup work happens once. You create your band, invite your members, and designate substitutes for members who may need backup. From that point on, when a booking opportunity comes in, you check the date and get an immediate answer. No group texts. No waiting on replies.
Booking checks, venue management, event creation, event editing/deleting, and confirmation sending are leader tools. Members and subs keep their own calendars current and respond to the requests you send.
Setting Up Your Band
1. Create a Band
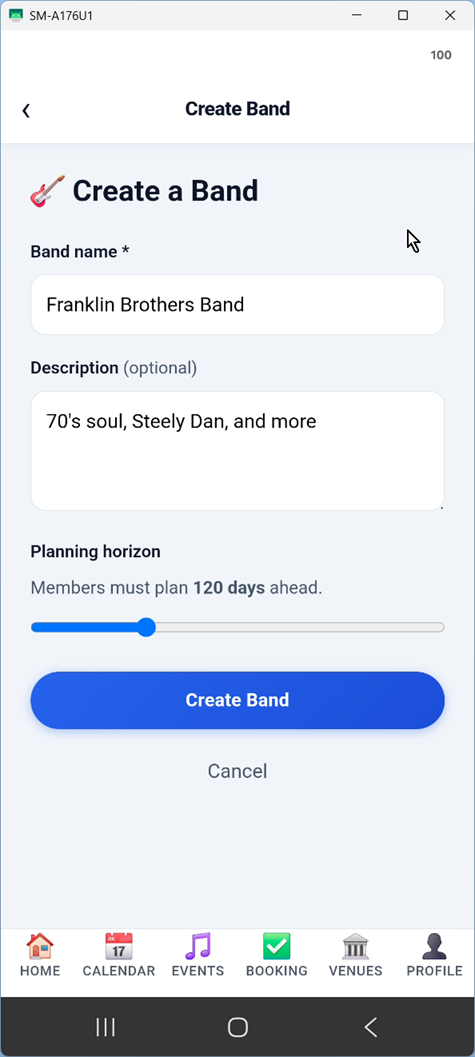
After creating your account, tap Create a Band. Give it a name your members will recognize when they receive their invitation. You're automatically added as the leader.
Use the Planning Horizon slider to set how far out members are expected to keep their availability current — the default is 120 days. A booking check can only return Green for dates within every member's coverage window, so this value determines your practical booking range.
If you play in multiple groups, create a separate band for each one. Members, bookings, and availability are all tracked independently per band.
2. Invite Your Members
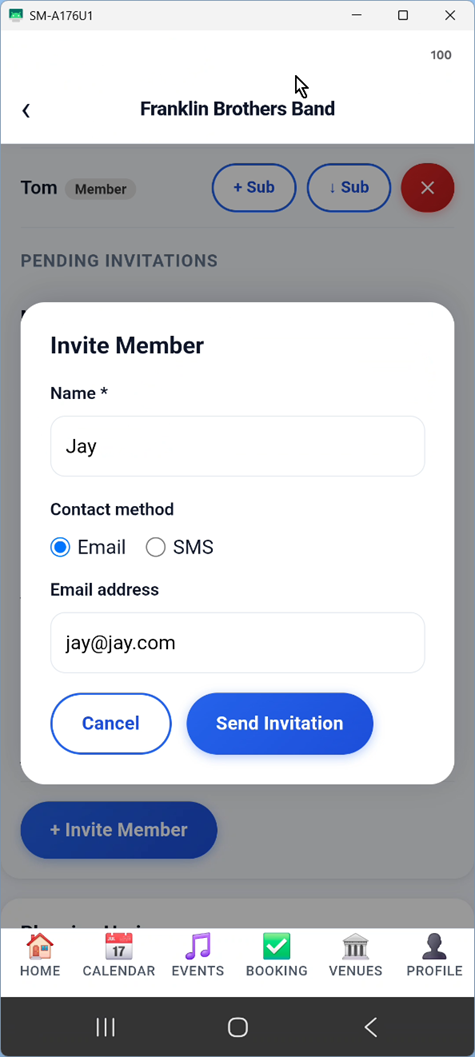
Tap Invite Member, enter the member's name, then choose Email or SMS as the contact method. They'll receive a message with instructions to download the app and join your band. If they already have the app, they'll also see the invitation in-app right away.
Active pending invitations stay visible where you need them. Older attempted, revoked, canceled, declined, or accepted invitations are tucked into Invitation History so the member list stays focused.
If someone declines, you'll see the declined status and any note they chose to include. Once they're in and have set up their availability, they'll start feeding into your booking checks.
3. Set Up Substitutes
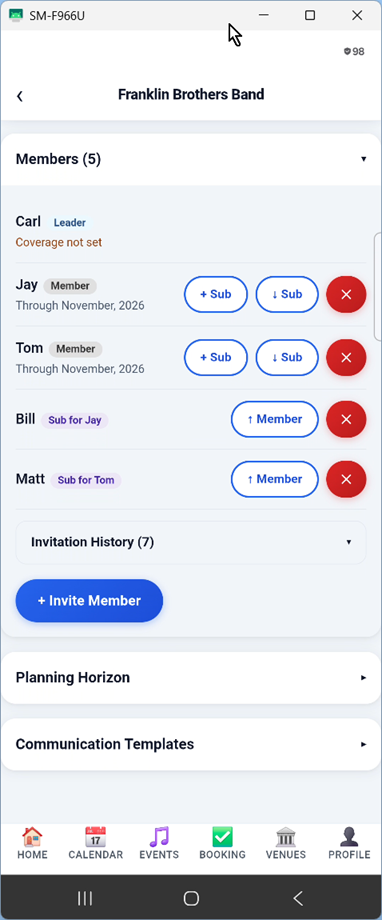
In the member list, tap the + Sub button next to a member's name to invite a substitute — a backup player who fills in when that member is unavailable. The invite works just like a member invite: enter a name and choose email or SMS.
Standing subs are linked to the specific member they cover. The app labels that relationship clearly, such as Bill (Sub for Jay), and checks that linked sub when Jay is unavailable.
Day-to-Day Workflow
Checking a Date
When a venue reaches out with a date, tap the Booking tab, select your band, and enter the date. The app instantly checks every member's availability calendar and gives you a clear answer.
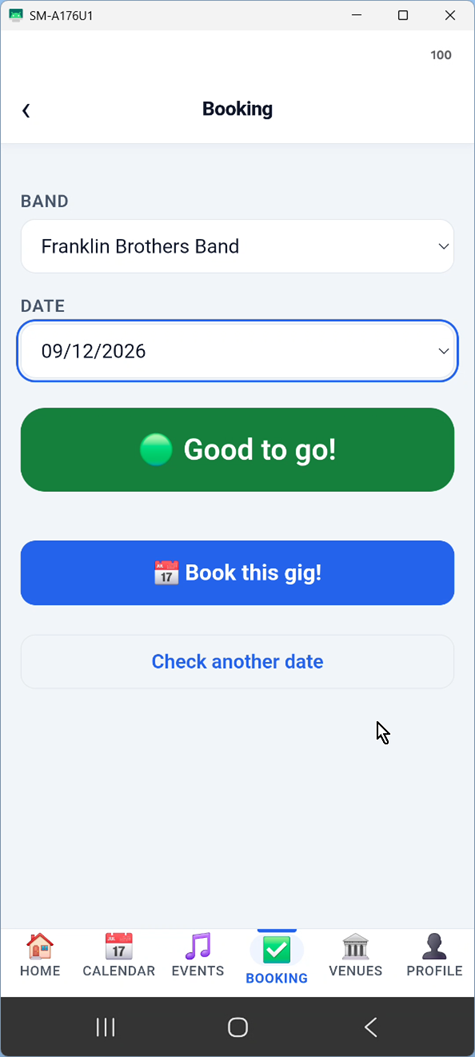
Green — Everyone is available and their calendars are current. You can tell the venue yes.
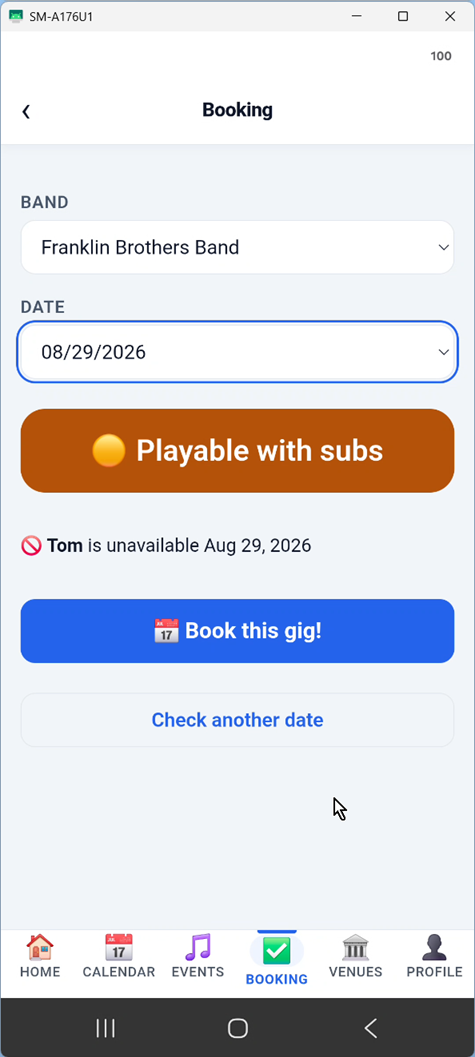
Yellow — Playable with Subs — At least one member is unavailable, but their designated substitute is free on that date. You can still book — confirm with the sub first.
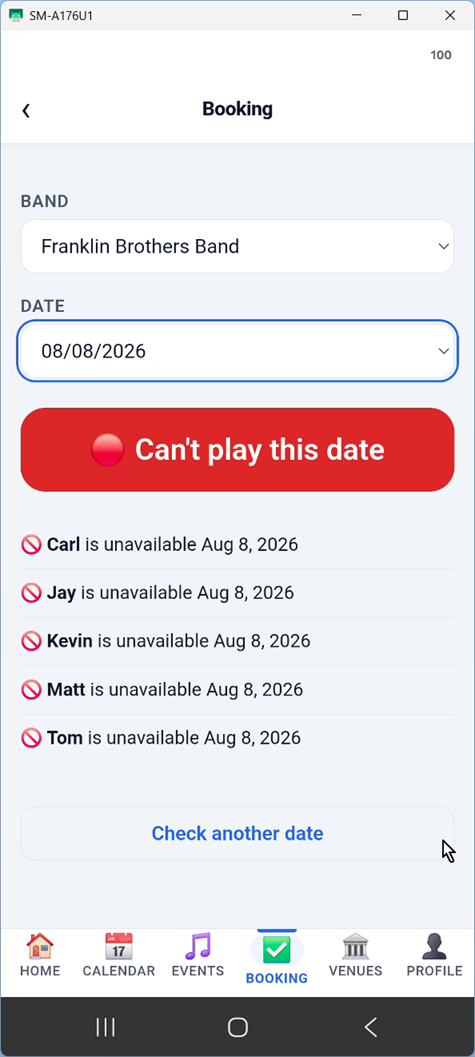
Red — Someone has a conflict and no sub is available, or a member's calendar isn't up to date far enough. The result shows exactly who so you can follow up directly.
Creating an Event
Once you've confirmed a booking, tap Book this gig! on the availability result to open the event form.
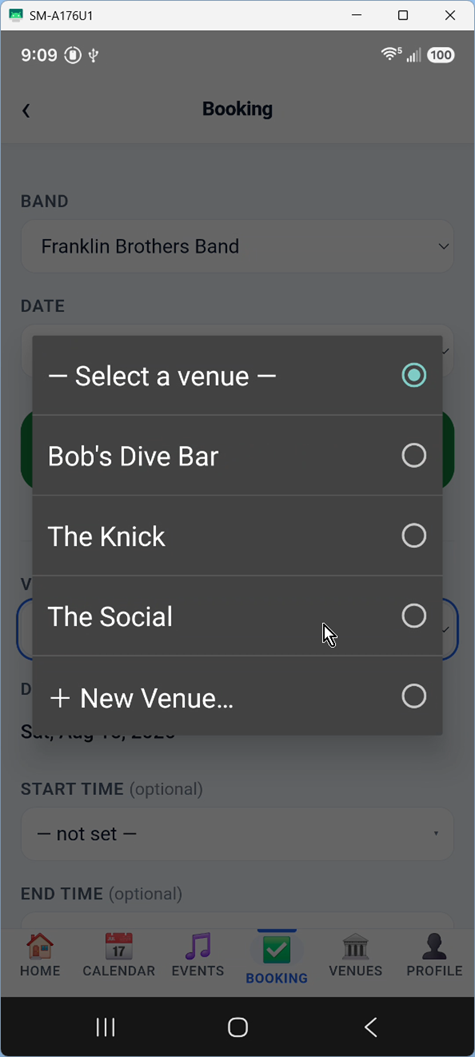
Select the venue from your saved list — or tap + New Venue… to add one on the spot with its name, address, phone, and website.
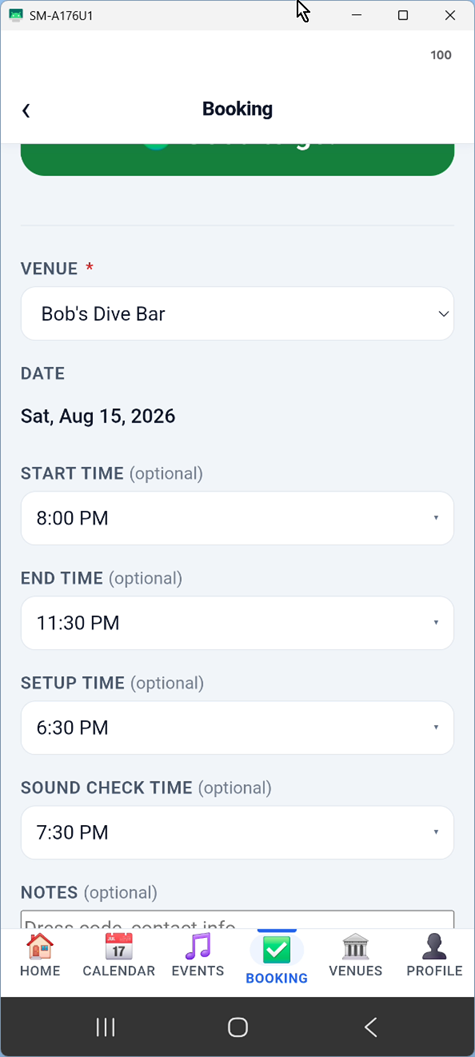
Fill in the timing details: Start Time, End Time, Setup Time, and Sound Check Time. All time fields are optional, but filling them in ensures every member has the full picture when they confirm.
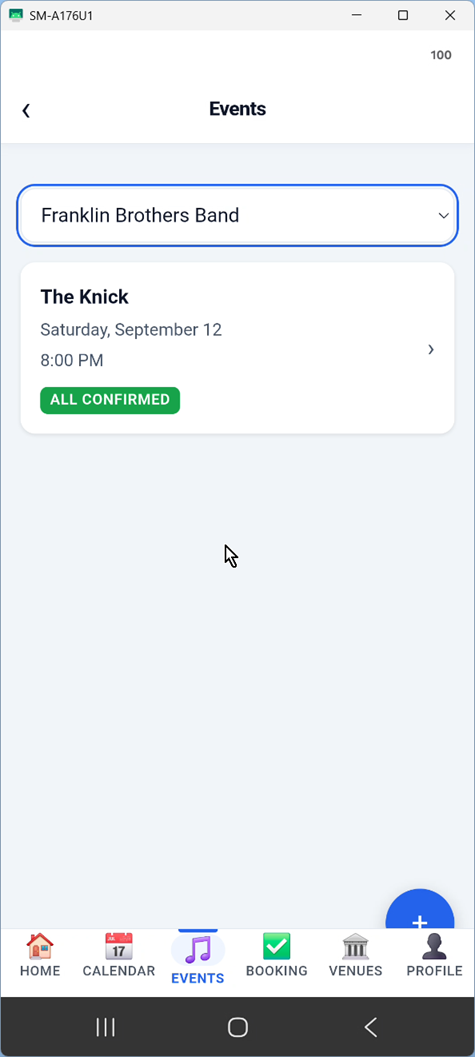
After the event is created, review the event detail screen and send confirmation requests. Members receive a notification and can confirm or decline directly in the app. The Events screen shows each member's confirmation status at a glance so you always know where everyone stands.
If someone declines or later needs out, they can use Find a sub from the event. The event shows that they are asking a specific sub to cover until the sub accepts, then changes to Sub found.
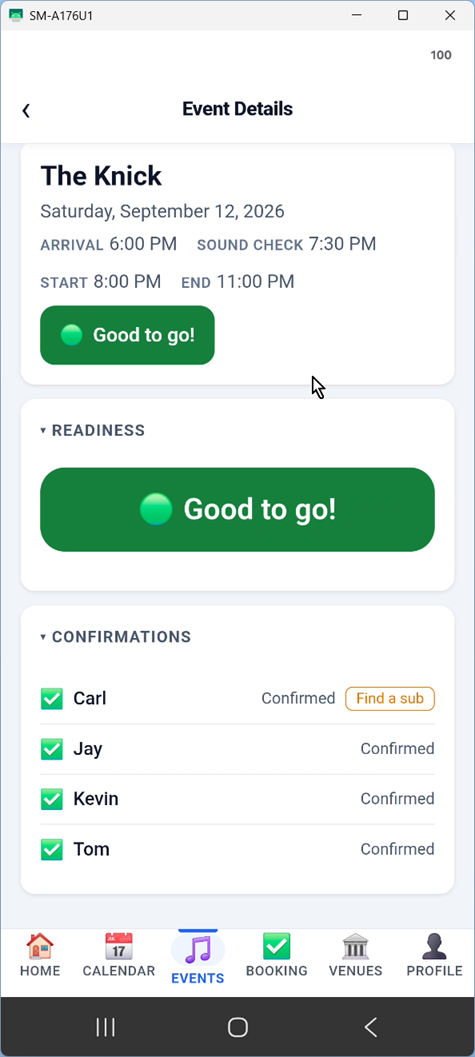
Tap any event to open the full detail view. The top card shows the venue, date, and all four time fields. Below it, the Readiness indicator shows the current booking status, and the Confirmations section lists every member's response so you can follow up with anyone who hasn't replied.
Managing Your Venues
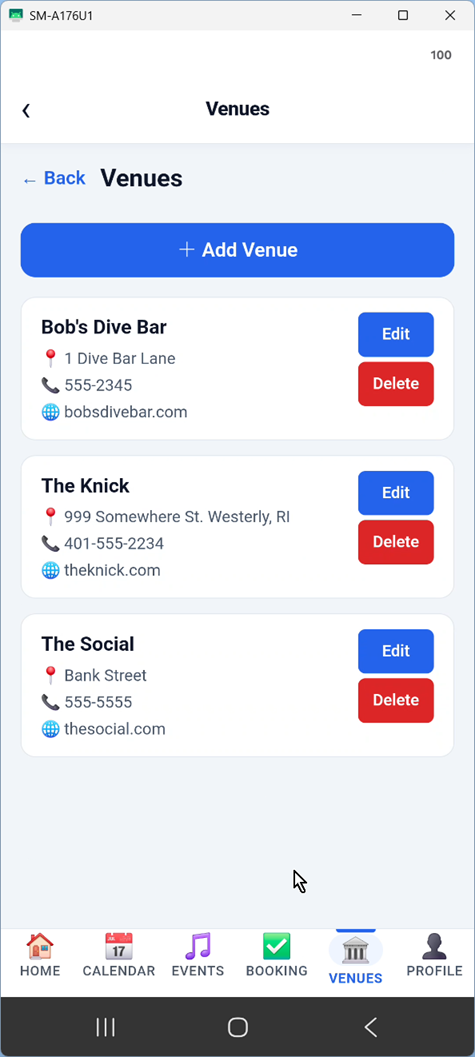
Tap the Venues tab in the bottom navigation to manage your band's venue list. Each venue entry can store a name, address, phone number, and website — so every member always has the contact and location details they need without anyone having to look them up.
You can add new venues, edit existing ones to update contact details, or delete venues that are no longer in use. Deleting a venue removes it from the list but does not affect any events that have already been booked there.
Members can view the venue list, but only leaders can add, edit, or delete venues.
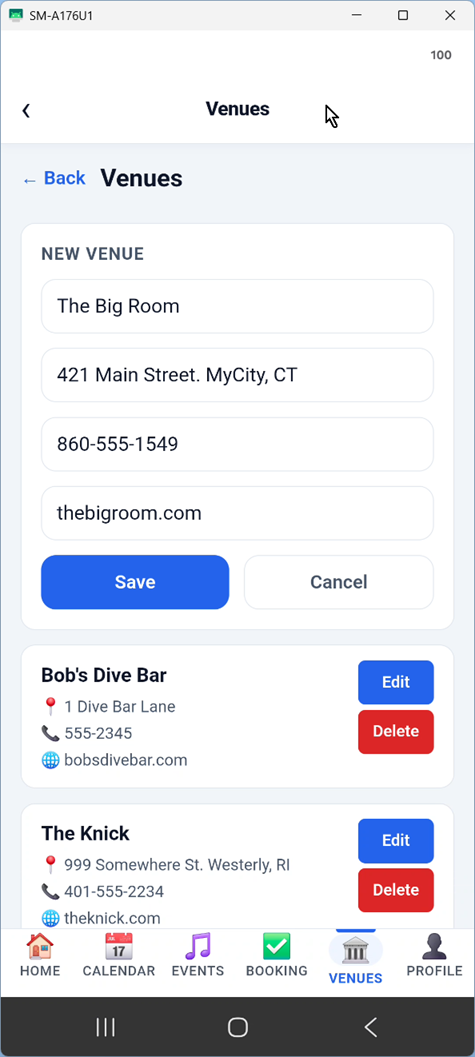
Tap + Add Venue to open the inline form. Fill in the name (required) and any optional details — address, phone, and website. Tap Save to add it to your list immediately.
Member Coverage
Each member has a Through Month, Year label — how far out they've maintained their unavailability calendar. If a member's coverage doesn't extend to your booking date, the booking check will flag it even if they haven't marked that specific date as unavailable.
When a member updates coverage, connected leader screens refresh automatically. When you see Coverage not set or an outdated month next to a member's name, send them a reminder to update their calendar. Once they extend their coverage date, the warning clears and the check reflects accurate data.
Real-Time Confirmation Responses
When a member confirms, declines, asks a sub to cover, or a sub accepts, connected leader screens update through the app's real-time connection. If you're already on Events or Event Details, the status should move without needing to return to Home.
Removing a Member
If someone leaves the group, remove them from the member list. They lose access to the band, their app updates the band list, and they'll receive a notification letting them know they were removed.